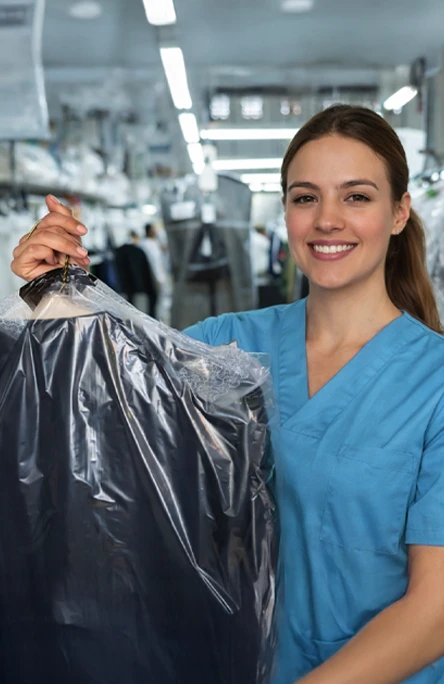
Most people take in their first dry cleaning item with some version of the same question forming in their head: what exactly happens to my clothes in there? You hand over a blazer or a silk blouse, someone gives you a ticket, and a few days later, it comes back looking better than the day you bought it. The process between drop-off and pickup is the part nobody really explains.
That’s the purpose of this guide. Whether you take in a suit for the first time or finally deal with that dress you’ve been avoiding, here’s a clear, honest walkthrough of what dry cleaning involves, what you need to do before you take in anything, and what the process actually looks like from start to finish.
A lot of people think dropping off clothes is as simple as pulling them out of the wardrobe and handing them over. That’s true for most items, but a few minutes of preparation on your end can make a real difference to the result you get back. It also gives your cleaner a clearer picture of what each item needs, especially when stains or delicate fabrics are involved.
The care label is the starting point for any garment. Look for the circle symbol, which indicates dry clean only, or a circle with a letter inside that specifies which solvent is safe for that fabric.
If the label says dry clean only, that instruction exists for a reason. Washing it at home, even on a delicate cycle, can shrink the fabric, distort the structure, or strip the colour in ways that can’t be reversed. Fabrics such as silk, wool, cashmere, velvet, and structured suit linings fall into this category, as do most embroidered or heavily beaded garments.
Pro Tip: If your garment is made of mixed fabrics, professional cleaning is usually the safest choice.
This is the single most useful thing you can do as a first-time customer. Tell the cleaner about any stains you’re aware of, and if you know what caused the stain, say so. Red wine, oil, ink, and coffee all respond to different treatments. A stain you don’t mention might not get targeted pretreatment, which can mean it comes back looking faded but still present, or worse, set permanently by the heat involved in finishing.
Pro Tip: Don’t try to treat stains at home before taking in the garment. Rubbing a stain spreads it deeper into the fibers, and certain home products can react with professional cleaning solvents, causing discoloration or fabric damage.
It sounds obvious, but forgotten items in pockets cause real problems during the cleaning process and can damage other garments being cleaned at the same time.
If a belt is sewn in rather than detachable, just let the cleaner know so they can handle it appropriately.
Pro Tip: Always double-check pockets before every visit, not just the first time.
If there’s a loose button, a small tear, or a worn seam on the garment before it arrives, mention it. Cleaners will typically note existing damage when they log in an item, which protects both you and the cleaner from any dispute about when it occurred.
How you take in your clothes can affect how they are handled from the start.
Pro Tip: Use a reusable garment bag for transport if you have one.
After drop-off, you’ll receive a receipt. Take a moment to check it before you leave.
Pro Tip: Save the contact details of the cleaner so you can follow up easily if needed.
The name is a little misleading. Dry cleaning isn’t actually dry. “Dry” refers to the absence of water, not the absence of liquid entirely. Garments are cleaned using a chemical solvent that dissolves grease, oils, and many stains without the agitation and soaking involved in water-based washing. That’s what makes it safe for fabrics that would shrink, stretch, or lose their shape in a regular wash.
Here’s what actually happens to your clothes from the moment you hand them over.
Every garment receives a tag when it arrives. This tag stays with the item through every stage of the process and ensures your blazer doesn’t end up going home with someone else. The cleaner inspects the item carefully at this stage, noting the fabric type, construction, any visible stains, and any pre-existing damage.
Before the garment goes anywhere near the cleaning machine, stains are treated individually. A trained technician applies specific spotting agents to each stain based on its cause.
Getting this step right is where experience really counts. An undertreated stain comes back in the wash. An overtreated spot can damage the fabric or leave a ring mark around the original spot. Proper treatment requires judgment built from handling thousands of different garments.
The garment goes into a professional dry cleaning machine, which looks broadly similar to a large front-loading washing machine but operates completely differently.
The most widely used solvent is perchloroethylene, commonly shortened to PERC. Some cleaners use newer hydrocarbon-based solvents or liquid CO2 systems, particularly for more delicate fabrics.
The choice of solvent affects how aggressively the cleaning acts on certain materials, which is why a good cleaner adjusts the process to the specific garment rather than running everything through the same cycle.
After the machine cycle, the garment is inspected again. If any staining remains, the technician goes back in with targeted spotting treatment before the item moves to finishing.
This second pass is where a lot of the skill sits. Not every stain comes out in a single cycle, and a trained eye can tell whether further treatment will lift what remains or whether the fabric has reached the limit of what cleaning can do.
Finishing is what gives professionally cleaned clothes the look home ironing rarely achieves.
A dress shirt pressed by a professional finisher looks different from a shirt ironed on a board at home, and the difference is immediately obvious when you put it on. Once the final check is complete, the garment is protected in a cover bag and hung ready for collection.

When you pick up your garment, take a moment to look it over before you leave. Check the areas where any staining was present and confirm you’re happy with the result. A good cleaner will note any stains that didn’t fully respond to treatment and will tell you about them directly rather than hoping you won’t notice.
One thing worth knowing: older stains that have been sitting in a fabric for months are significantly harder to remove than fresh spots. If a stain has been in a garment for a long time and the cleaning has reduced but not eliminated it, that’s often the realistic outcome, even with expert treatment. Taking in clothes promptly after they’re soiled gives the best chance of removing stains completely.
Remove the plastic cover bag as soon as you get home. Those bags are for transport, not storage. Keeping clothes sealed in plastic traps moisture and can cause fabric to yellow over time. Hang the garment in an open wardrobe on a proper hanger and let it breathe.
Pro Tip: If you won’t be wearing the item for a while, store it in a breathable cotton garment bag rather than the plastic cover provided at pickup.
At Courtesy Cleaners, first-time customers receive the same level of attention as the regulars who’ve been coming in for years. Every garment is inspected individually and treated with the proper process for its specific fabric and condition. Our advanced dry and wet cleaning systems, including SYSTEMK4 technology, are designed to treat fabrics gently while removing deep stains and odors.
As a family-owned business serving Manatee County, we focus on consistent results and careful garment care so you don’t have to second-guess the outcome.
Have a question about a specific item or want to know how we’d approach a particular stain or fabric? We’re happy to talk it through before you decide.
Phone: (941) 499-8886
Address: 3509 Manatee Avenue West, Bradenton, Florida
Email: contact@courtesyfl.com